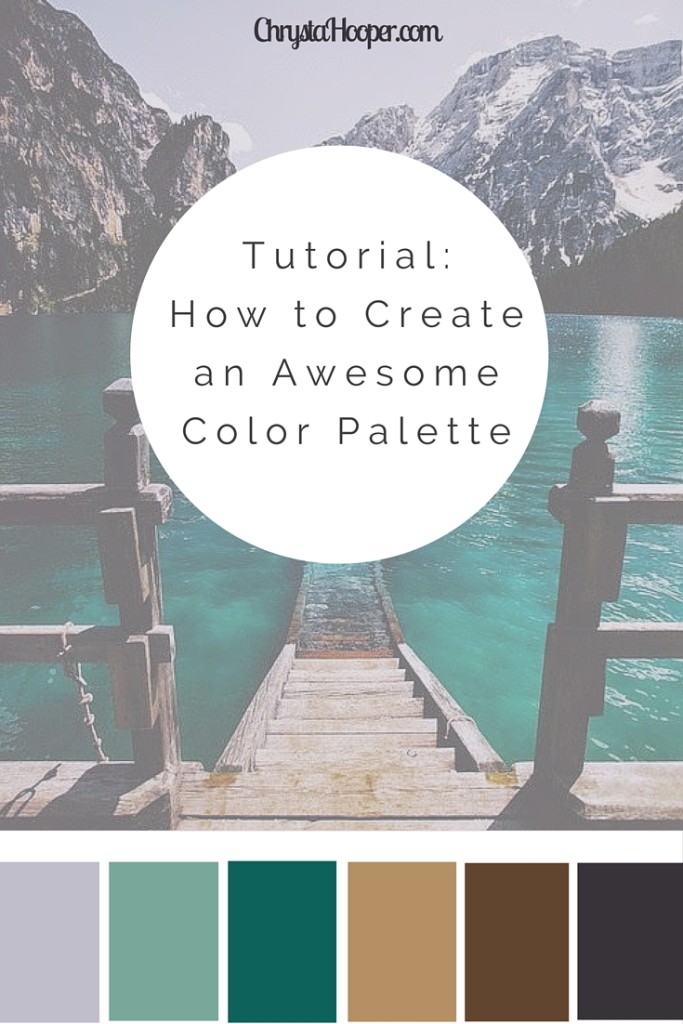
Tutorial: How to Create an Awesome Color Palette
Have you ever seen a photo and thought about how you’d love to use that color palette? You’re really excited to take the photo into Illustrator or Photoshop and try to use the eyedropper to pick out the palette. Unless you are really good at it, and if you’re like me you end up wasting time and create a palette that looks NOTHING like the image.
Step 1: Choose a photograph that has a pleasing color palette
Whether you are looking for colors to paint your living room, or looking for a new palette for your website, or just want to create a color palette for future reference. You need a photo that works with your given project. Try not to look at the subject matter of the photo, we only care about the colors for this tutorial!
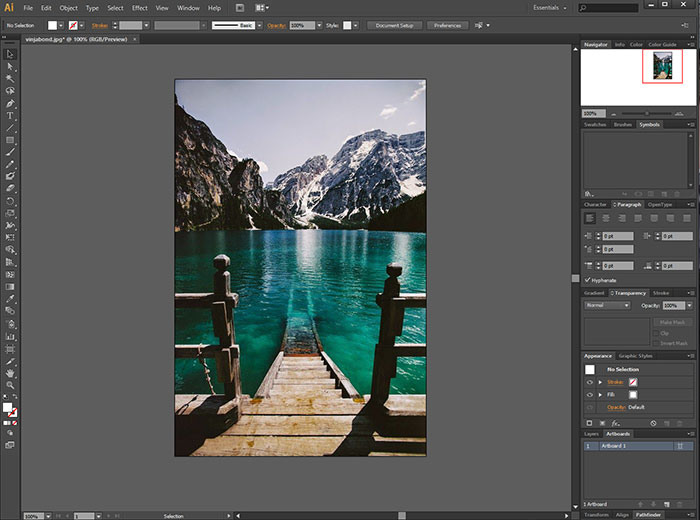
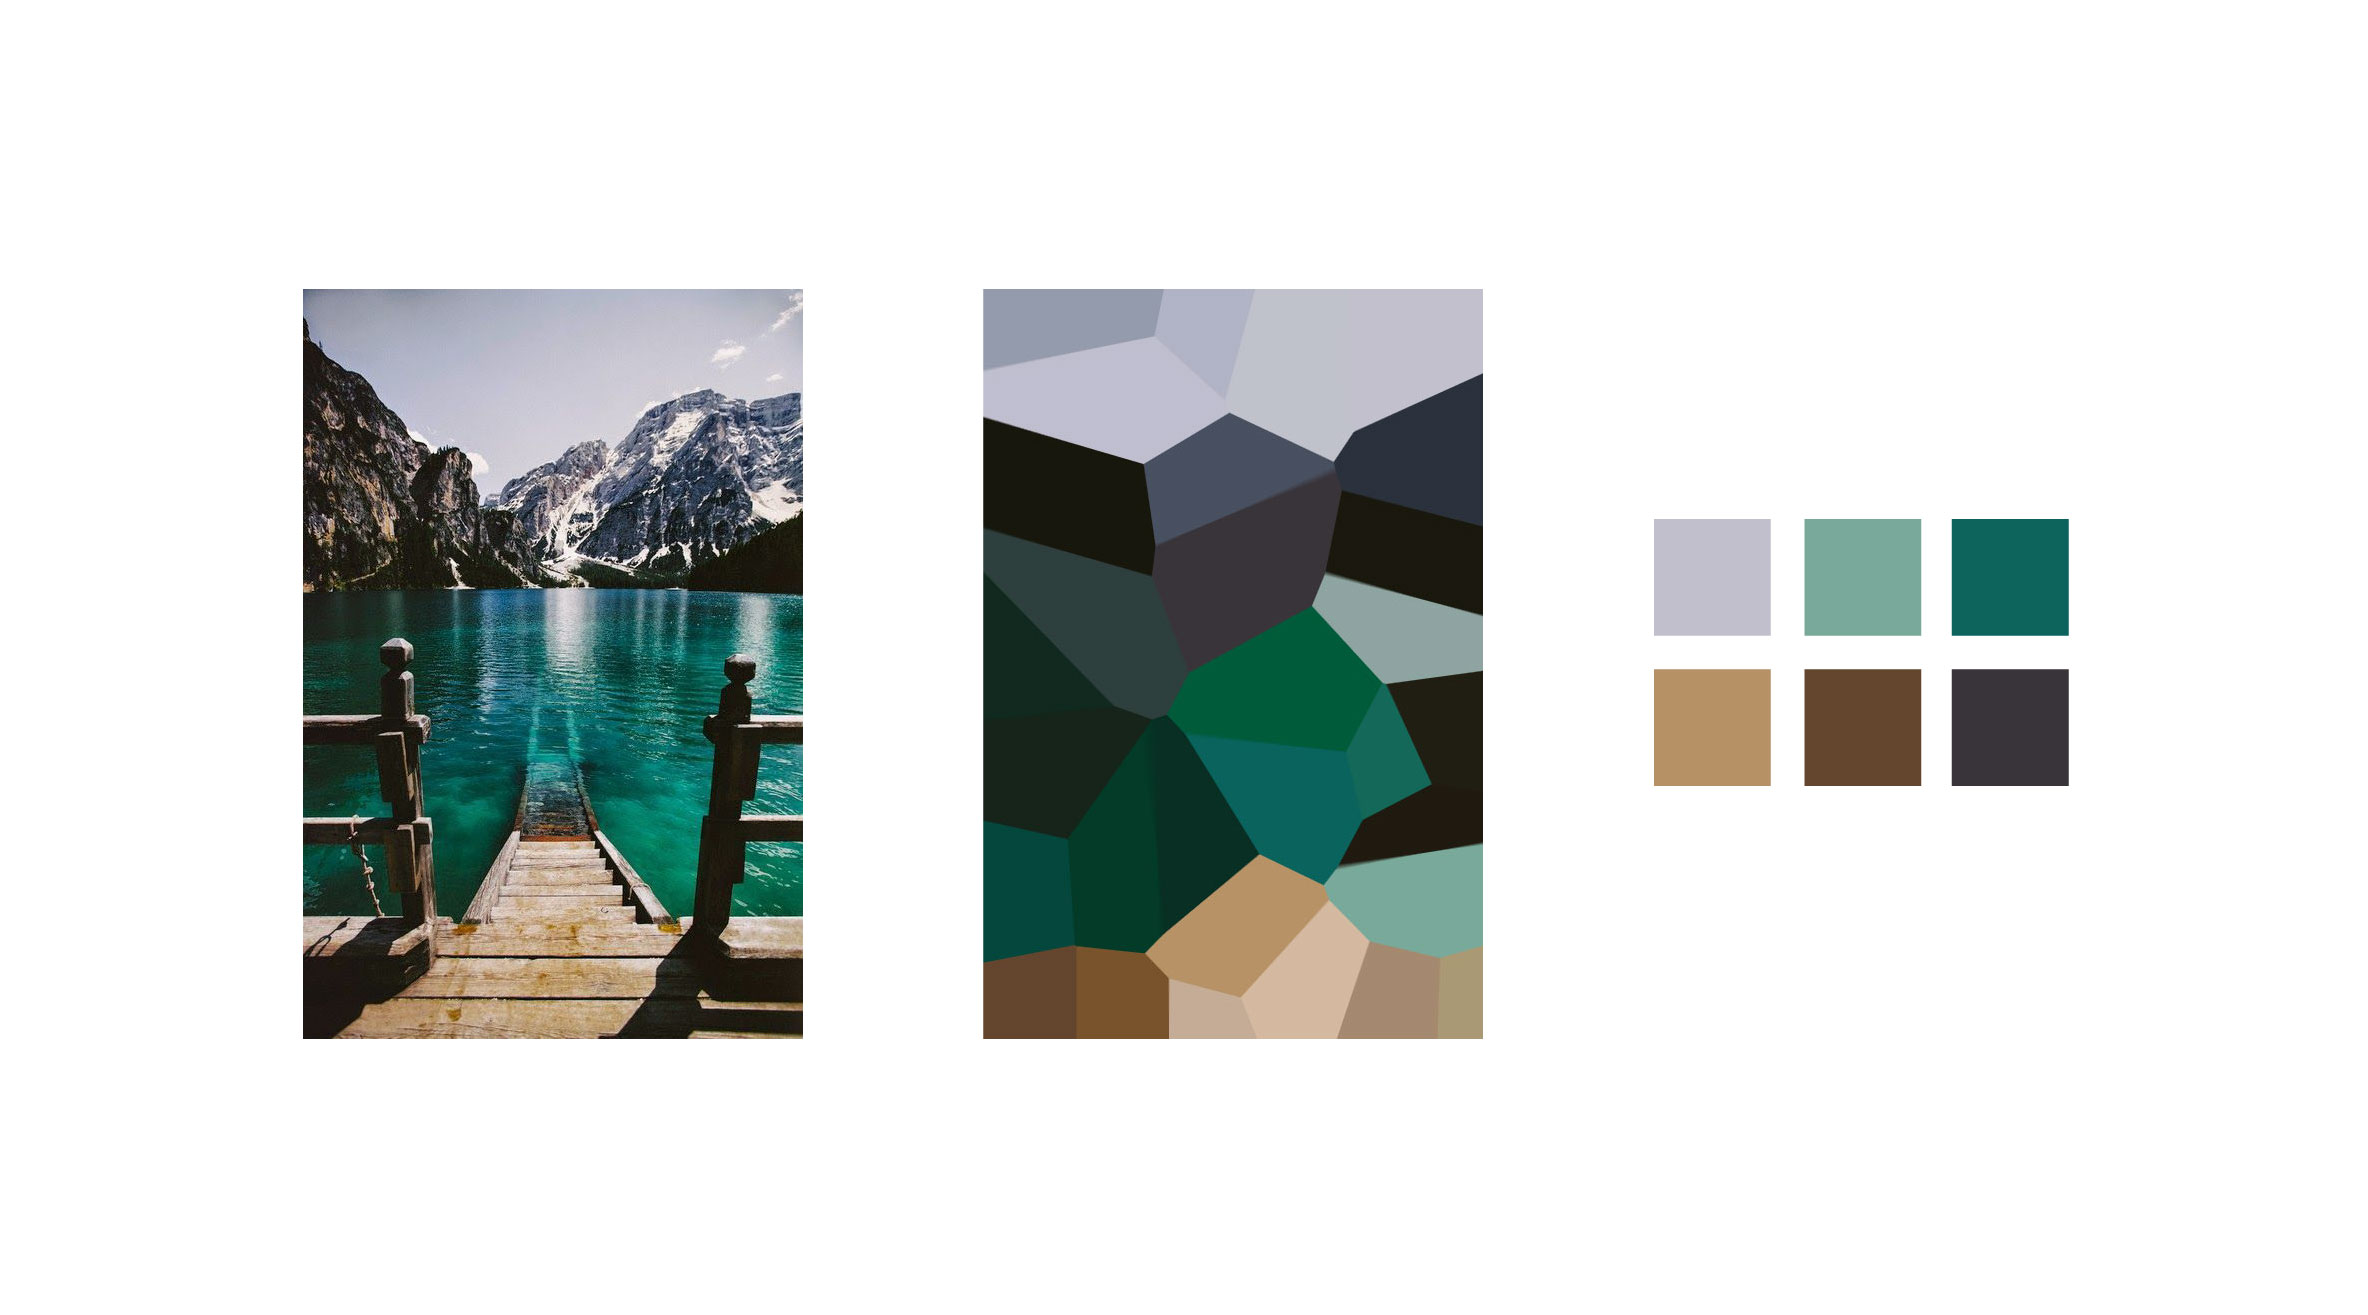
I found this photo on VINJABOND via Pinterest. I absolutely love the colors in this photo.

Step 2: Open your photo with Illustrator
Step 3: Open the Crystallize Effects tool
In Illustrator, open your Appearance Panel (go to Window > Appearance).
Click on the fx button at the bottom of the panel, then hover over Pixelate, then choose Crystallize.
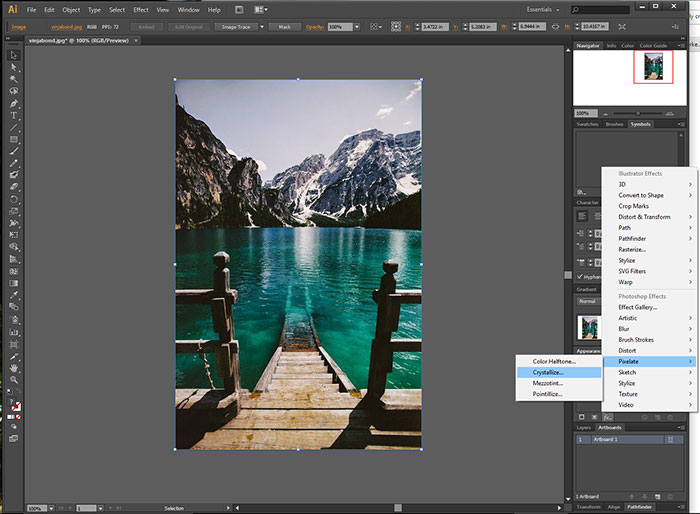
Helpful Hint: If you aren’t used to using Illustrator, make sure you are clicked on the image when applying the Crystallize Effect. You will know that you have selected the photo because it will be outlined with a blue border A dialog box will pop up, first you will want to zoom out so you can see more of the photograph. 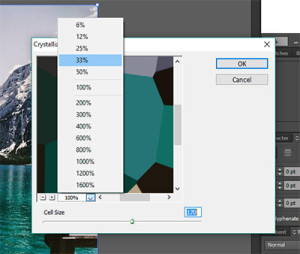 Next, adjust the Cell Size until you get the desired sizes. The larger the cell size is, the more fool-proof your color palette is going to be. Then hit OK.
 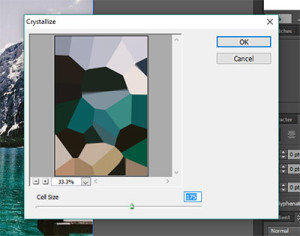 See how easy it was to pixelate the photo so we captured the essence of the photo’s colors?
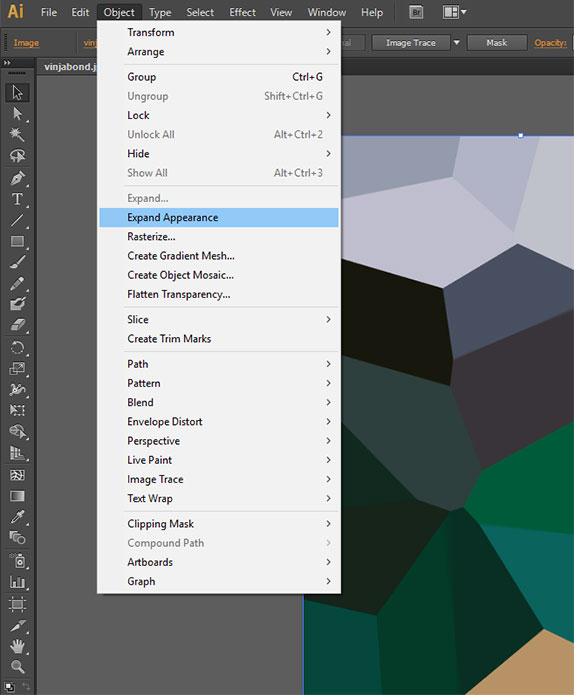
Step 4: Flatten the artwork
This step is important, because even though it looks like you have flat shapes of colors, there are still some pixel variations in the objects (it’s very hard to see it because the colors are close, but this could undo all the hard work you put in so far!) To make sure the crystallized artwork is turned into flat objects, go to Object > Expand Appearance.
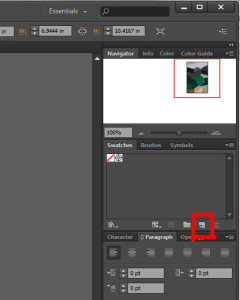
Step 5: Create your color palette
Now you can grab some of the colors and add them into the swatches palette in Illustrator.
Open Your Swatches window by going to Window > Swatches.
With the Eyedropper tool, click on the first color you want to use. After the color is selected, click the page icon for New Swatch.
A dialog box will pop up that will show you the specifics of the selected color. If you want to rename the swatch, you can do so here! Keep repeating this step until you have the desired colors!
I hope this helps you create beautiful color palettes! If you would like to see a specific type of tutorial, please let me know in the comments!
 I’m Chrysta, an artist, illustrator & designer living in a small town in Pennsylvania. I love creating things that will bring joy and happiness to others.